Sunday, May 13, 2012

S'mores Tart


Happy Mother's Day!

I hope everyone enjoyed their day.  We finally got completely settled and unpacked in our new apartment. That with the blueberry pancakes my husband made for breakfast and the fact that he and my almost three year old had cleaned up and organized ALL her toys before I got out of bed... Well, who could ask for a better present??

For my special Mother's Day treat, I wanted to make something easy and quick that my daughter could help make. I've been seeing the displays at the store for S'mores and I LOVE them. However, they aren't exactly toddler friendly.  I couple years back, my husband and I made these S'more tarts (like mini pies) just on a whim.  So I decided to make them again. They are SUPER easy and are only three ingredients: Chocolate Chips, Marshmallow Creme and Mini Graham cracker crusts.

 Ingredients

Best Invention Ever

Lay out your crusts on a cookie/baking sheet.  Then fill your crusts about halfway to 3/4 full with chocolate chips. I put about 2 handfuls in each one. Or like 6 child handfuls if you have a special helper. Now, most people know that I am partial to Nestle semi-sweet chips. However, for these I love Hershey's Special Dark chips.

She spent more time eating than filling.

Once they are filled to your liking, pop them into a preheated oven for about 2 min. This is to melt the chocolate chips so you get a nice layer. They should look like the picture below when they are done.

MMM Glistening melted chocolate

Once I take them out of the oven, I usually give them each a good shake. Chocolate chips hold their shape pretty well when melted so shaking allows them to spread out. Now I caution that these will be HOT. So I place one on an oven-mitted hand and using my other hand, tap the crust until the chocolate smooths into a somewhat even layer. Once you've done that to each one, add a dollop of Marshmallow Creme. It does not have to cover the whole top. It will spread a bit once it goes back in the oven.

Topped with Marshmallow Creme!

Notice how in my picture they are NOT perfect. Once they puff up a little bit you can smoosh them a bit to cover all of the chocolate and move it around a bit.  So, once you have placed the creme on top, pop them back in the oven. I usually leave them in until they start to brown a bit on the top. I didn't leave them in as long today because I was kind of rushed.  Usually it's about 10 or so minutes. Also, if you save them for the next day and reheat, you get a crispy shell of marshmallow on top that is SO good.  

Slightly Browned

Once done, they just need a few minutes to cool and then they are all set to eat.  Like I said, super easy.  Plus they are so unbelievably less messy than traditional S'mores.  Like eat them with a spoon or fork not messy.  And as always, the vote that most matters. Kaedence LOVED them.

Recipe
1 pkg Keebler Mini Graham Cracker Crusts
1 bag Hershey Special Dark Chocolate Chips (you'll use about half or so)
1 Jar Marshmallow Fluff

Preheat oven to 350 Degrees
Place pie crusts on cookie/baking sheet
Fill crusts half to 3/4 full of chocolate chips
Heat in oven about 2 min
Shake each crust individually so an even layer of chocolate forms
Top each crust with a generous dollop of Marshmallow Creme
Pop back in oven for about 10min or until your preferred brownness has been achieved.
Allow a few minutes to cool and enjoy! 

Again, I hope everyone had a fantastic weekend and Mother's Day!

Monday, March 26, 2012

Buttercream Eggs


I'll admit it... I'm cheating. I did not actually make these. At least not this year.  Sadly, now that the girls and I have relocated to Pittsburgh and are staying in a 1 bedroom apartment while we find a permanent residence, most (albeit all) of my baking equipment is in NC. Bummer. I'm really upset about my now inability to bake and the fact that I can't make these super yummy Buttercream eggs that I LOVE to make and eat for Easter. My mom would make these for Easter and I was really excited about keeping up that tradition with my family. So the fact that I can't make them stinks! But I did take pictures when I made them last year for Easter so I will just use those.
 Buttercream Ingredients

These are really easy and simple to make and only use 4 ingredients (counting the chocolate they are dipped in). I prefer to make these using the KitchenAid mixer, but you could use a hand mixer too. The first step is to soften your butter. You want it room temperature NOT melted. Once it's soft toss it in the bowl. I usually will give the butter a spin just so it's already a bit stirred. In my opinion it helps with the mixing. Then you SLOWLY add the confectioners sugar to your butter. You want to be mixing as you add the sugar.
Mixing in the Confectioners Sugar

Once the sugar is all mixed in, you add your teaspoon of vanilla. Stir for an extra minute to make sure the vanilla is evenly mixed. Now the fun part! Take small amounts of your 'dough' and with your clean hands, roll and form it into egg shapes.  It is up to you how big or small you want to make them. Place the eggs on a cookie or baking sheet lined with parchment paper and refrigerate for a couple of hours until they are nice and firm. The colder they are, the easier they will be to dip.
My not so uniform 'eggs'

Once your eggs have chilled and hardened you can start melting your chocolate.  I like using Nestle Semi-Sweet chocolate chips, but you can use whatever chocolate or candy melts you like.  I also typically use a double boiler to melt my chocolate. I have had not so great experience with burning chocolate in the microwave.
MMM Melted goodness
 
Once your chocolate is melted, you take your buttercream eggs one by one and dip them into the chocolate making sure they are totally covered. I've found that sticking a toothpick in the egg and dipping it is pretty easy. Though this time, I was out and used two spoons to roll the egg through the chocolate.  Once it's covered you want to let some of the excess chocolate drip off before placing the egg back on the parchment paper. After you've dipped all the eggs, place them back into the fridge until the chocolate hardens. 
All Dipped!

Now you want to keep these stored in the fridge. I pop them off the tray and keep them in a Tupperware container. I'm not really sure how long these stay good for since they RARELY make it past a week in my house. 

Recipe
1 Stick of Butter (Softened NOT melted)
1 Box (1LB) Powdered/Confectioners Sugar
1 tsp Vanilla Extract
12-24oz Semi-Sweet Chocolate Chips *I like a thick covering of chocolate so it's better to have more*

Soften Butter
Using mixer, add in all Confectioners Sugar
Add in the teaspoon of Vanilla Extract and mix well
Taking small amounts of your dough, form into egg shapes
Place on parchment paper and refrigerate until firm.
Melt Chocolate using double boiler
Dip eggs one by one into chocolate coating well
Place back on parchment paper and refrigerate until chocolate hardens
Keep in fridge!
 
Wishing everyone a Happy Easter and I hope you all like this recipe!

Sunday, March 4, 2012

Mel's Famous Fudge!!


Now, I don't want to toot my own horn or anything... but if there is one thing I am known for making, it is FUDGE. I've been making it for years and have tweaked recipes until I came up with my own. I started making this in High School a whopping 10 YEARS ago. The last few years, I haven't made it as often, but it is still one of my favorite things to make while I'm visiting family. 
Ingredients

Now, my recipe makes like a lot of fudge (some thing like 4-5lbs or about 2 cake pans and some left over to eat out of the pot) and uses a LOT of sugar.  You can make a smaller batch by just halving everything. I always make a lot because I usually end up bringing some to my in-laws or to my old work. 
The first step is the easiest.  You melt the butter, add the evaporated milk and stir until combined. Then you add your sugar. And stir, stir, stir!
Mixing in the sugar

This next step is probably the hardest. Once the sugar is mixed, you bring the mixture to a rapid boil.  Now, at this point, most people will use a candy thermometer or a softball test, but I don't. I test for done-ness by checking the spoon to see if the sugar has dissolved.  It typically takes about 5 after the mixture starts boiling. If you boil to long, you will end up with fudge that is super hard (and gets hard once you add the chocolate). That sorta happened to me this time. It wasn't that bad, but I knew I had done it a bit too long. If you don't boil long enough, you can end up with gritty fudge. Confession time... When I first started making fudge, I didn't realize you had to boil until the sugar dissolved. I would bring it to a boil, then add the chocolate. So my fudge was SUPER gritty. And people still ate it and talked about how good it was!!!!
Boiling
Checking the spoon

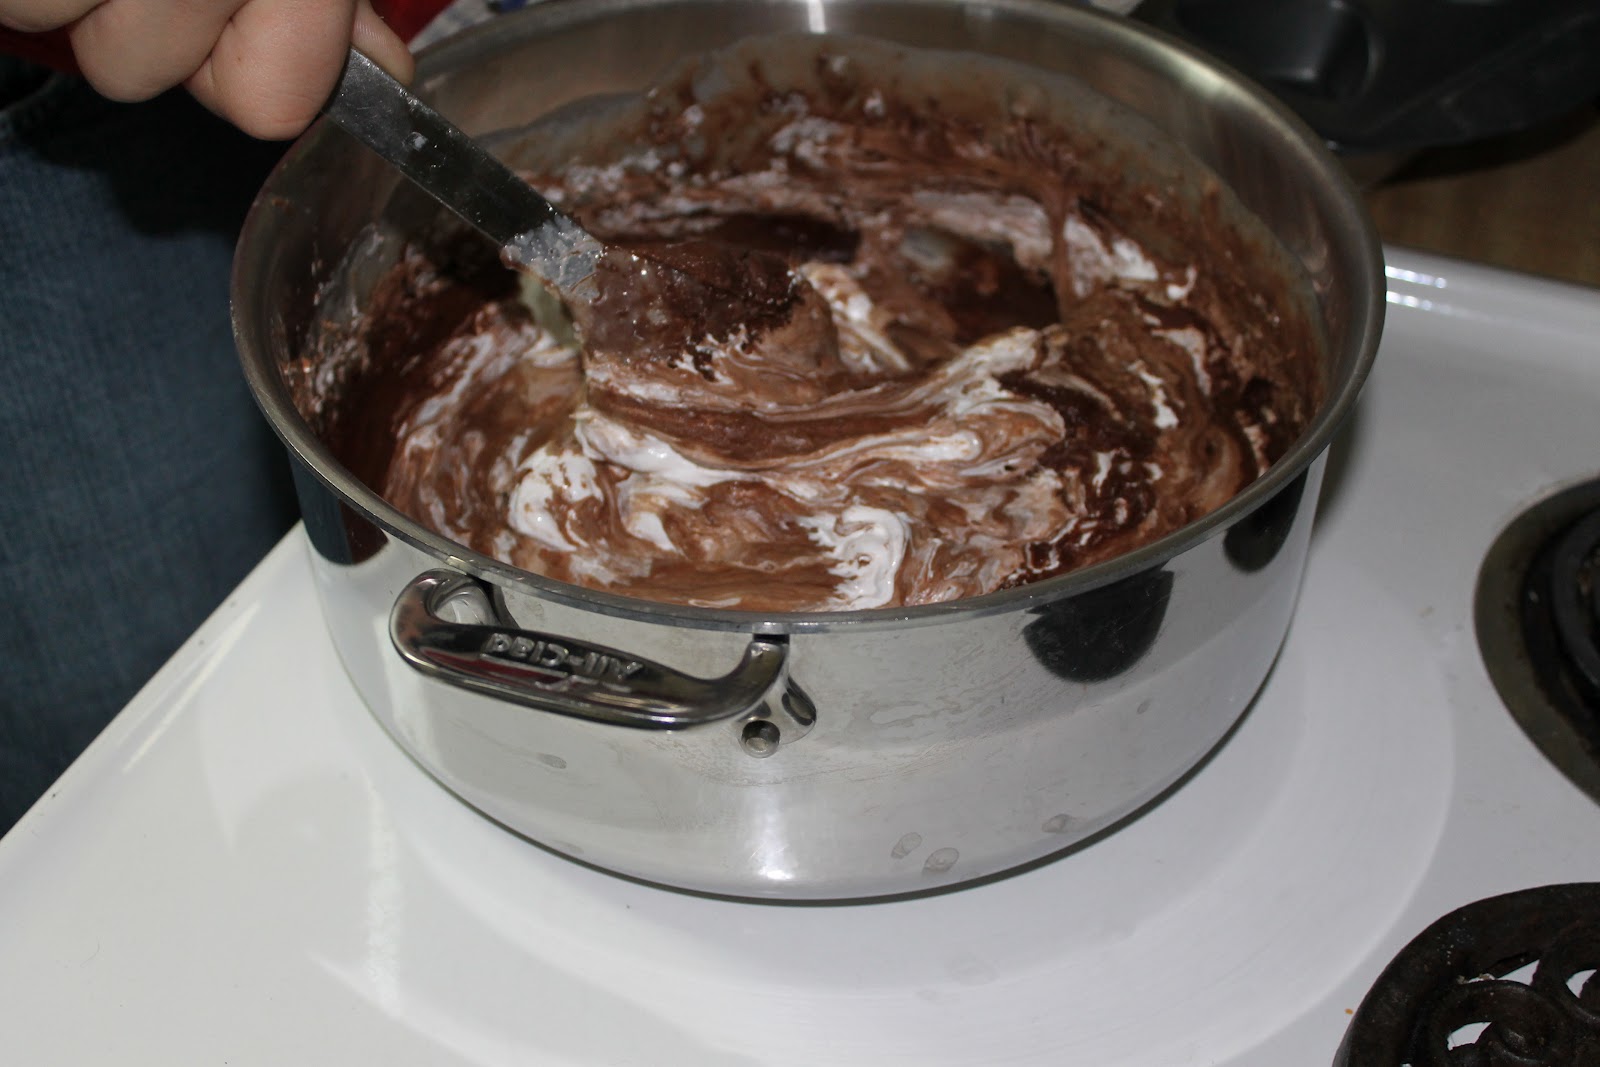
Now, I'm sure taking pictures didn't exactly help my timing. So, once you have dissolved the sugar, turn your heat off and add in your chocolate chips stirring until the chocolate is melted. Then you immediately stir in the marshmallow fluff.  At this point I usually have someone help me stir because it gets really thick and can by hard to stir.
 My sister's boyfriend helping stir in the Fluff

As soon as the fluff has been mixed in, you pour the fudge into greased pans.  I used just a regular square cake pan and then tried using some heart mold pans.  The heart ones weren't as easy to fill as I thought. But they did pop out easy and were nice looking to gift to people.


PANS

My favorite part about making fudge is eating it out of the pot.  I always leave a bit extra in the pot and my mom, sisters and I will just grab some spoons and eat the super warm fudge. YUMMY.  

Recipe
1 Stick of Butter
10oz Evaporated Milk
5  Cups of Sugar
24oz of Chocolate Chips (2 standard 12oz bags)
3/4 Container of Marshmallow Fluff (15oz container)

Melt butter in large pot
Add evaporated milk and stir to combine
Add Sugar slowly, stirring constantly
Bring to boil of medium-high heat. STIR  CONSTANTLY (it will burn to bottom if you let sit)
Boil for 5 minutes or until sugar is dissolved
Add Chocolate chips and stir until melted
Add 3/4 container of Marshmallow Fluff and stir until combined. *Best guess of amount is fine. I'm sure I never get it exactly right*
Pour immediately into greased pans. 
Let cool.
 
Eat and enjoy!!!! 


Sunday, February 19, 2012

Cookie Dough Dip

 
Yes, you read that right. COOKIE DOUGH DIP! I saw this recipe on addapinch.com (via Pinterest) and knew I just had to try it. It was super easy to make and I also tweaked and doubled the recipe for a party I was going to.

Ingredients

This dip is made in 3 easy steps.  The part that takes the longest (at least in the winter) is softening the butter. It's crazy how much longer it takes, and I always forget and then end up rushed for time.  If this happens to you, pop your butter in the microwave and heat at 5 second intervals (took 2 times for me).  That way it's quick, and you don't end up with melted butter.

Creamed Butter and Cream Cheese

Once your butter and cream cheese is softened, you cream them both together until they are completely combined. I used a stand mixer as it is much easier than doing it by hand.


Add the powdered sugar, brown sugar and vanilla next, mixing until well combined. Be careful with the powdered sugar as it 'puffs' and can be pretty messy.

Mixed and ready for the chocolate chips!

I always add chocolate chips last to any cookie related recipe for two reasons. The first being, I like to taste the batter to check the flavor before the chocolate takes over. The second reason is because I like to play around with the amounts of chocolate chips I use. I like lots!
Adding the Chocolate Chips

Once the chocolate chips are added, I put the dip in a serving bowl and refrigerated it until the party so it would be chilled. You could have eaten it right away, but I thought it would be better colder. 
YUMMY

The dip was a big hit, and it seemed like everyone really liked it. I served it with chocolate graham crackers, but I was told by a few people that they would have enjoyed it with just a spoon. I doubled the recipe, but I'm giving you the recipe for a single batch.

Recipe:
1/2 Cup Softened Butter
8 oz package softened Cream Cheese
1 Cup Powdered Sugar
2 Tablespoons Brown Sugar
1 1/2 Teaspoons Vanilla Extract
6oz Mini Semi-Sweet Chocolate Chips (half a regular size package)

Cream together butter and cream cheese.
Add Sugars and vanilla and mix until combined.
Add chocolate chips (more or less to your preference) and mix.
Serve immediately or chilled with graham crackers.

Hope you enjoy!!

Tuesday, January 24, 2012

Chocolate Chip Cookie & Oreo Fudge Brownie Bars

I know it's been FOREVER since my last post.  With the holidays and then husband job-related stuff, it's been crazy town.  Now that the girls and I are visiting family I can finally get back to baking. For our big Sunday family dinner, we decided to make Chocolate Chip Cookie & Oreo Fudge Brownie Bars. My mom and I had seen this recipe on Kevin & Amanda and have been obsessed ever since. It's hard to make such and indulgent dessert like this for just myself and my mom so we had to wait until we had a big family event.

 
My ever present helper
 
Mixing the dough in my Patriots jersey.
 
The first thing you do is make the Chocolate Chip Cookie Dough. It takes the longest, and it's the first layer of the bar.
Softened Butter
Add Sugars

After you allow your butter to come to room temperature, you add your sugars and blend with electric mixer until creamy.  Then you add your eggs and vanilla.  Once that is all blended, you add your dry ingredients. I know most people say to mix the dry ingredients in a separate bowl, but I have never done that.  I just pile them all on top of the wet ingredients and mix. The last thing I add (because yes, I do taste test the dough) are the chocolate chips.  Once that is all mixed, spread the dough in a 9x13 pan.  The recipe I was following called for lining the pan with wax paper, but my mom was out of it so I just sprayed the pan really well.
See, just pile on top.
Cookie Dough all spread in the pan.

After your dough is all spread in the pan you top it with the double stuffed oreos. This was the easiest part.


Already looks delish!

Then you make your brownie mix according to the package directions. I used Dunkin Hines Dark Chocolate brownie mix(I prefer Betty, but couldn't find the flavor I wanted). I then added 1/4 cup chocolate fudge sauce to the brownie mix stirring until it was evenly mixed. Then I poured it over the cookie dough/brownie mixture. I used a rubber spatula to make sure it was evenly spread.
Ready to be baked.
 
Now here is were I totally fudged the instructions. I said I would be honest in this blog, so here it is. I TOTALLY messed up the cooking of this recipe. I read that it should be cooked in a 350 degree oven for 15-25 minutes.  Totally missed the first part that said to cook it covered first for 30min.  I cooked it about 35-40 min after constantly checking it and noticing that it was really gooey.  So mine ended up VERY gooey. Still good but gooey. I'll give you the *correct* instructions with the recipe at the end.
Out of the oven
All done and SUPER fudgy.
 
After watching the end of the Pats playoff game, we cut into these. They were super, super rich.  We didn't top ours with ice cream, but I would TOTALLY recommend it. I think I good scoop of vanilla ice cream would totally cut down on the richness of the dessert. And honestly, I've been eating the leftovers, and they were even better the next day.  And as always, the most important thing, Kaedence loved this dessert.
 
Recipe:
2 sticks softened butter
1 cup granulated sugar
3/4 cup light brown sugar
2 large eggs
1 Tablespoon pure vanilla extract
2 1/2 cups all-purpose flour
1 teaspoon baking soda
1 teaspoon salt
1 pkg (12oz) Semi-Sweet Chocolate Chips
1 pkg Double Stuffed Oreos
1 Family Size (9×13) Brownie mix
1/4 cup hot fudge topping

Preheat oven to 350 degrees F.
Cream the butter and both sugars in a large bowl with an electric mixer.
Add the eggs and vanilla and mix well.
Add dry ingredients and stir until well combined.
Stir in chocolate chips. 
Spread the cookie dough in the bottom of a 9×13 baking dish that’s been lined with wax paper and sprayed with cooking spray. 
Top with a layer of Oreos. 
Mix together brownie mix, adding an optional 1/4 cup of hot fudge topping to the mix. 
Pour the brownie batter over the cookie dough and Oreos. 
Cover with foil and bake at 350 degrees F for 30 minutes. 
Remove foil and continue baking for an additional 15-25 minutes.
Let cool completely before cutting.
 
Hope you enjoyed this recipe as much as we did! 

Saturday, December 17, 2011

Deviled Eggs


I'm sure there are people that think it's crazy to have a post about deviled eggs. But in all seriousness, this is the first time I've ever made them.  I have never thought of making them before. Maybe it's because they always remind me of a holiday or big family-gathering food.  And they always seemed like a hard thing to make, when in reality, they are super easy. I of course had to call my mom to find out how she makes them. I remember them being REALLY good, and wanted to make them like she does.
Boiling Eggs!

The first thing you have to do is boil your eggs. Now I have a special way of boiling eggs that I learned from the Food Network. You put your eggs in cold water then bring to a boil. Boil for ONE minute, then remove from heat.  For hard boiled eggs, let sit for 10 minutes.  For some reason, the eggs come out perfect when cooked like this, and the yolks have a golden orange color as opposed to the powdery yellow (sometimes greenish) color.  Once the 10 minutes are up, pour out water and re-cover eggs with cold water.
Cold bath

My post-baby brain caused me to almost reach into the pot of super hot water to grab an egg before having them sit in cold water. I don't know why, but I remembered right before I touched the scalding hot water. Phew! Now for the hardest part: Pealing the eggs. This either goes REALLY easy and good for me, or downright bad.  I boiled 6 eggs and had 5 and 1 lonely yolk once all were peeled. Once all your eggs are peeled, slice eggs in half (longways) and 'pop' the yolk out of the eggs into a small bowl.
See? Nice golden color

Once you have all the yolks in a bowl, mash with fork and add mayonnaise and mustard.  You can add anything you want, but I just made basic Deviled Eggs.  Combine until creamy. Then spoon back into the empty eggs.  I know some people pipe the egg mixture into the eggs, but I'm just not that fancy!
Popped out pretty easily

All mixed together!

The cool thing about deviled eggs is that they are customizable. You want relish in them? Add it! Hate mustard? Don't use it! They are that easy! When I make these again, I will use a bit more mustard, because you couldn't really taste it. I wanted the tang I remember my moms having. Maybe though, it's just one of those things our mom's will always make better.

Recipe:
6 Eggs
About 1/4 Cup mayo (a little more, a little less)
Mustard (add to preferred taste)

Hard Boil Eggs
Peel Eggs
Slice in half longways
Pop Out Yolks into bowl
Mash Yolks with a fork
Add desired amount of mayo and mustard until creamy.
Spoon into halved eggs.
Refrigerate about an hour before eating. 

In case I don't get a chance to post next week (Bowl week and Christmas), Happy Holidays!

Sunday, December 11, 2011

Blueberry French Toast

One of the things served at my bridal shower almost 6 years ago was this really delicious Blueberry French Toast. It was so good, and although I have had this recipe for oh, like 5 years, I only just made this for the first time on Easter. It was a huge hit. I know I talk about my daughter a lot, but when your two year old really likes something, it's a VERY good thing. And she liked this breakfast. There is a bit of prep for this breakfast as it requires preparing the night before. But it is WELL worth it.
Ingredients (Salt was an oops)

The first thing you need to do for this recipe is to buy the bread. It works best with day old bread. I have used fresh (bought and prepped same day), but the bread absorbs more if it is a day old.  Now when I went to the grocery store on Friday, I got a baguette of french bread FRESH OUT OF THE OVEN. It took all my willpower not to rip into that divine smelling, warm bread. A lot of breads will have the date they were bagged on them, so check because you may be buying one that was bagged the day before. So you would want to use it that night.  Once your bread is 'day old' you are ready to start preparing your french toast! Slice bread into even (about an inch to an inch and a half) slices. If they aren't even it's okay. Mine rarely are. You then lay them flat in a buttered 9x13 dish.
Yes those little fingers did steal a piece
All lined up in your dish

Then it's on to the egg mixture.  I find it easier to put your brown sugar, nutmeg, and vanilla in the bowl first before the eggs or milk. I give the dry stuff a quick stir, than add the eggs and stir all that up. Then slowly add the milk. For me, I've found that doing it that way makes it mix up a bit more uniformly. I always end up with some brown sugar stuck to the bottom of the bowl no matter how hard I stir or whisk. So don't worry if you do too. Once everything is mixed you pour it over your bread. Flip each piece of bread to make sure it is well coated. Then cover with tinfoil and refrigerate overnight.
How it looks before going in the fridge.
After it's overnight soak.

In the morning, take out your pan, remove the tin foil and let sit while your prepare the rest to let some of the chill off.  Melt butter and brown sugar in a saucepan together until butter is fully melted.  Top bread with blueberries and drizzle bread and blueberries with your brown sugar butter mixture. 
Looks good even with uncooked egg

Pop into preheated oven for about 25 minutes.  Now, I usually let cook for the full 25min and then using a spatula smoosh the blueberries a bit to let the juices out. I do this for 2 reasons. The first being, I like having the blueberry smeared every where.  The second: It's not fun when a not so hot feeling blueberry bursts molten juice in your or your child's mouth. Really. Not. Fun. In fact it involves lots of crying (yes I am talking about myself). So, I give those babies a quick smoosh and then I pop the whole thing back in the oven for about 5 extra minutes. I like crispier bread and it gives the bread a chance to absorb some of the blueberry juice.  Now today because Craig had to work, I didn't do the extra 5 minute cooking and it was still good. Also, the blueberries resisted most of my spatula attack. So we just made sure we popped the one's on Kae's french toast when we cut it up. 
Fresh out of the oven (before attacking blueberries)

As I said, there is a good deal of prep for this meal. But the end result is so good. I love that the flavor is so good, you don't need to add anything (like syrup) to it. It's delish all on its own.

Recipe:
1 baguette (day old)
5 eggs
1 1/2c milk
3/4c packed brown sugar (divided)
1tsp vanilla extract
1/2tsp ground nutmeg
4TBS butter (Cut into pieces)
2 Cups blueberries


Butter 9x13 pan.
Cut baguette into 1- 1 1/2 inch slices. Arrange in even layer in pan.
Whisk eggs, milk, 1/2 cup brown sugar, vanilla and nutmeg in bowl and pour evenly over bread.
Turn bread slices to make sure they are coated.
Chill Overnight.
*Next morning*
Preheat oven to 400 degrees
Take dish out of pan and let sit for about 20min to take chill off.
Sprinkle blueberries over bread.
Combine butter and 1/4 cup brown sugar in small saucepan, until butter is melted. Drizzle over bread.
Bake 25 minutes or until blueberry juices are bubbling.

Now it's time to watch the Patriots/Redskins game. My two favorite teams, playing each other. It's a win/win! Happy Sunday!