Wednesday, October 16, 2013

Cake Batter Blondie Bars


I made these yummy blondie bars as one of the treats for my daughters 2nd birthday. I have a niece and a sister who don't like chocolate (yes, sometimes I think they are from another planet too), so I like having something that is chocolate free that they can eat. These were great, easy and really colorful so they are perfect for a party.
Ingredients


Your first step is to combine the cake mix, oil, egg and milk. Add the milk slowly, as you don't want the batter to liquidy. You want a dense batter. Then add in your sprinkles and white chocolate chips. I had a special helper. And she may or may not have licked the mixer attachments clean.
My happy helper
I used two different types of sprinkles, Rainbow sprinkles and nonpareils. I like the difference in texture and honestly, I like nonpareils more than sprinkles. Don't over mix the sprinkles in as they will start to leach color into your batter. Also, I would recommend not using super dark sprinkles as they will almost immediately color your batter.
 All mixed
Once your batter is all mixed, pour it into a greased baking pan. I was out of Pam, so I rubbed a little butter in the bottom and covered it with parchment paper. The butter is used to keep the parchment paper from moving around (see below).


Pour your batter into the prepared pan. I spread it just a bit so it was even throughout the pan.
Ready to bake

Bake for about 25-30min until edges are just starting to brown. You want them to be gooey in the middle. Allow to cool at least 30min before cutting into bars.
ALL DONE!  

I loved the softness of the batter with the crunch of the sprinkles. I was worried that they would be too sweet, but they really weren't. And everyone really liked these at Ariana's party. Even the chocolate lovers!
Recipe:
1 box cake mix (white or yellow)
1/4 cup canola oil
1 egg
1/3 cup milk (you can use more if needed, do not exceed 1/2 cup)
1/2 cup sprinkles  *I used 1/4 cup sprinkles, 1/4 cup nonpareils
1/2 white chocolate chips
Preheat oven to 350 degrees
Grease baking pan
Combine cake mix, oil, egg and milk. Add milk slowly.
Mix in chocolate chips and sprinkles. Do not over stir.
Pour into prepared baking pan.
Bake 25-30 minutes until edges are just turning brown.
Cool for at least 30 minutes and cut into bars.
Extreme Blondie Bar Closeup!

Friday, September 20, 2013

Crispy Fried Chicken


I have wanted to make fried chicken for a LONG time. It's one of my favorite things to eat (not sure if that's due to growing up in VA or because it's so good). I've always been a little wary of making it, because it seemed like it would be a lot of work and really messy. This does take a fairly long time, but it really wasn't that hard. Mostly, it was a lot of prep work.
 
Ingredients for marinade (minus water)
 
The first step in making this fried chicken is to make your marinade. You add all your ingredients in a big pot (including your halved lemons) and 1 gallon (or 16 cups) of water and bring to a boil. You let it boil until the salt has dissolved.
Marinade
 
Once your marinade is done, you need to chill it so as it doesn't cook your chicken. I popped a couple ice cubes in it and put it in the fridge. I hadn't read this step, so it threw me for a loop. I think it takes about an hour to chill in the fridge. Once it's chilled, put your chicken into the marinade and let sit in your refrigerator for at least 4 hours. After the four hours, rinse chicken, pat dry and lay them out on parchment paper. Allow them to sit for about an hour or until they come to room temperature.
The chicken after it's 4 hour soak
  

 Ingredients for the coating
 
You are now ready to make your mixture for the coating. You need 2 bowls for the coating, and 1 bowl for your buttermilk.  Evenly split your flour and spices between 2 bowls. Add 3 tablespoons buttermilk to one of the bowls until the mixture is crumbly.  Your mixtures should look like the pictures below.
 Crumbly mixture (right)
Dry mixture (left)

 
Set up your bowls as following: Dry bowl, buttermilk bowl then crumbly bowl. Place a parchment paper lined baking sheet next to the last bowl.  Pour your oil into a pan and heat until it reaches 320 degrees. I used a deep fryer thing that my MIL had and a candy thermometer. On a separate baking sheet, place paper towels and a cooling rack on top for the chicken to drain. Now prepare to get messy! Coat each piece of chicken in the dry mixture, then dip into the buttermilk. Allow the excess to drip off, then roll the chicken through the crumbly mixture. Lay on your parchment paper and repeat with each piece of chicken.
Chicken in dry mixture
Coated and ready for frying!
 
Once your oil is heated, drop your chicken in carefully (I had a basket, but if you don't use tongs). I fried 3 drumsticks at a time. Cook 8-10 minutes or until cooked through. I cooked about 9 min and cut into the first pieces to make sure they were done. Use your tongs to take your finished chicken out of the oil and place on the cooling racks.

Chicken getting cooked!
My first finished pieces!
Allow to cool and enjoy!! I served mine with garlic mashed potatoes and peas and this meal was a big hit. I'm actually going to make it again next week, but I might try adding some hot sauce (just a little) for a bit more spice.  I've heard conflicting things about whether to add it to the buttermilk or the crumbly mixture, so if anyone knows the answer, let me know! Oh and wondering if the girls liked it?
Kae loved it ;0)
 
Recipe: (Adapted from The Rookie Cook)
2-3lbs Chicken Drumsticks
For the Marinade
3 lemons, halved
1/3 cup dried parsley
1 Tablespoon dried thyme
1/4 cup honey
2 Tablespoons minced garlic
2 Tablespoons black peppercorns
3/4 cup kosher salt
1 gallon (or 16 cups) water

For the Coating
3 cups flour, divided
2 Tablespoons garlic powder, divided
2 Tablespoons onion powder, divided
2 teaspoons paprika, divided
2 teaspoons salt
1 teaspoon black pepper, divided
2 cups + 3 Tablespoons buttermilk, divided
For Frying
1 Quart Canola Oil (I needed a bit more than that)
 
Combine all the ingredients for the marinade in a large pot.  Bring to a boil stir for about 1 minute, or until salt dissolves.
Remove from heat and chill the marinade (about an hour). Then add your chicken. Chill for about 4 hours.
Take chicken out of marinade, rinse under cold water, and pat dry.  Let sit for 1 1/2 hours, or until it comes to room temperature.
Take out 3 medium sized bowls.  Pour 1 1/2 cups of flour in each, and divide the garlic powder, onion powder, paprika, salt, and pepper equally between the two bowls.
Add 3 Tablespoons of buttermilk to one of the bowls and mix til it is crumbly.
In your last bowl, pour the remaining 2 cups of buttermilk.
Set up your bowls with the dry bowl first, then the buttermilk, than the crumbly mix.  Place a parchment lined baking sheet or pan next to the last bowl. 
 Pour oil in a large pot (you want it several inches deep), and using a thermometer, bring the oil to a temperature of 320°. If using a deep fryer, set to setting for chicken ( I still tested heat with thermometer)
Line a baking sheet with paper towels. Place a cooling rack on top the baking sheet for the cooked chicken to drain.
Coat each drumstick with the dry mixture, then dip in the buttermilk and let the excess drip off.  Then, roll the drumstick in the crumbly mixture and place on the parchment covered baking sheet.  Repeat with your remaining chicken.
Once the oil is heated, carefully lower drumsticks into hot oil and fry for 8-10 minutes, or until chicken is cooked through. 
 Remove chicken from hot oil using tongs and place on prepared cooling rack. 
Repeat with remaining chicken .  
Let cool 10 minutes before serving.
 
Extreme Chicken Closeup


Wednesday, August 28, 2013

No-Bake Marshmallow Oreo Bars


These bars I made for Christmas. I saw them on Pinterest and they were called Lump Of Coal bars. They only use 3 ingredients and there is no baking involved! I think mine were a little over mixed (and the Oreos a bit over chopped).  I would maybe not mix as much so you could see the Marshmallow and Oreo's a bit separately. As it was, mine turned out a bit like Oreo Taffy. They were still really good though!
 
 
First you want to ground up your Oreo's. I used a food processor. They should end up looking like the below picture.
 
Set the Oreo's aside and start working on the Marshmallows. You want to take your butter and your Marshmallows and in a small pan, melt them over low heat.  Make sure you stir constantly as this WILL stick and burn to the bottom of the pan. Once they are melted, immediately pour the Oreo's into the marshmallow and mix. Press into a parchment paper lined baking sheet.


Once it has cooled, you can slice into bars.  These had a really strong and nice Oreo flavor. As I said before, I would have mixed mine a hair less so you could see the Marshmallow and Oreo.
 
RECIPE (Adapted from Picky Palate)
1 pkg Oreo's (crushed)
4 tablespoons butter
1 pkg Jet Puffed Marshmallows (or 5 cups)
 
Crush Oreo's
Melt Butter and Marshmallows on low heat.
Immediately mix in Oreos
Press mixture into parchment paper lined baking sheet.
Slice into Bars and enjoy!

Thursday, August 22, 2013

Chocolate Fudge Pie


This pie (IMO) goes by two different names, Chocolate Fudge Pie, and Chocolate Chess Pie. I think the only difference, and I could be wrong, is the crust. Typically the Chess pie uses a traditional pie crust while the Fudge pie uses a graham cracker crust.
Now my love for Chess pie started when my husband worked for NC State. For Thanksgiving, the whole football team and staff would eat at The Angus Barn . The food was awesome, but my favorite part was the dessert. It was the first place I had ever had Chess Pie. The only down side for me was the crust. I really don't care for traditional pie crusts. I typically will try pies with different crusts (like pumpkin with graham cracker). My sister actually told me she made a pie similar to the Chess Pie but that it was called a Fudge pie. So for Thanksgiving, I decided to make the pie using a chocolate graham crust.
Ingredients
 
Since I always like to go the easy route, I used a premade crust. I honestly thought about using an Oreo crust, but figured I'd go more traditional. Though, I may try that the next time. So really the fist thing you need to do is take the cover off and set the crust aside. Easy Peasy right?
Then melt your butter with the cocoa powder in a microwave safe bowl until the butter is all melted. I usually cut up the butter so it melts faster and microwave for 20 second intervals. It should look like the below picture when it is all melted.
Melted butter and Cocoa powder
 
Once it is melted and mixed, add the sugar, salt, vanilla, and eggs. Whisk together until it has been thoroughly mixed.

All mixed
 
Pour your mixture into the pie crust and bake in a pre-heated 325 degree oven for about 40 minutes, or until the top has set.
Ready for the Oven
All Baked!
 
When the pie is done baking, it should have a crisp, shell like topping, while the inside is a fudgy, brownie-mix like consistency. Which is basically how this pie tastes. Like yummy hot brownie mix. Needless to say, this entire pie was gone by the end of Thanksgiving.  You can eat it plain, or top off your piece of pie with some vanilla ice cream. Either way, I think you will enjoy it!
 
Recipe:
1 premade 9 inch pie crust (I used Chocolate Graham)
1 Stick of Butter
3 tablespoons Unsweetened Cocoa Powder (I used Hershey's Special Dark)
1 cup Sugar
2 Eggs lightly beaten
1 teaspoon Vanilla Extract
1/4 teaspoon salt
 
Preheat oven to 325 degrees
Melt butter and cocoa powder in microwave safe bowl
Add Sugar, Eggs, Vanilla and Salt and whisk together
When mixed thoroughly, pour into your pie crust
Bake for 40 minutes or until top is set.
*optional.. Serve with vanilla ice cream*


Tuesday, August 6, 2013

A quick note.....

I have been totally ignoring this blog recently. I am just now getting around to posting recipes I have done that are almost a YEAR old!! How bad is that?!?!  It's been a stressful year, let me tell ya.  But, I promise that I will try to be better at posting new recipes.
Besides.. Football season is getting ready to start and we all know that that is when I do most of my baking.

'Talk' to you soon!

S'mores Cookie Bars


Anyone that has seen my Pinterest boards knows that I LOVE S'mores. I pin just about anything S'mores related that I see. They are seriously one of my favorite desserts and I have made them a couple different ways (check out THIS recipe).  I then saw a picture posted on Pinterest of S'mores paired with chocolate chip cookies. HEAVEN! They also looked extreamly easy, so I knew we had to try them.
 
INGREDIENTS
 
 
I used two smaller (8x8 i think) square pans for this recipe. Lay down the graham crackers first so they cover the bottom of the pans. It should look like the below picture:


You will probably use about 9 graham crackers total.  Once you have that done, take your cookie dough and spread it out on parchment paper so that it is a thin layer. You want to spread it out to the size of your pan. Then place the cookie dough on top of your graham cracker.


Bake that at 350 degrees for about 9 min, or until they are mostly cooked through. Once it's done cooking, break up your chocolate bar and spread it over the top. I'm not exactly sure how much chocolate I used, but it's really up to you. I probably used about all 6 for two pans. But we love chocolate in my family! Then add your marshmallows. The marshmallows should totally cover the top.
All covered in marshmallow goodness!


Bake in the oven (which should still be at 350 degrees) until the marshmallows are brown and puffy. I like my marshmallows a bit crispy, so I went until the edges were darker.
ALL DONE!
 
Surprisingly, this cut into squares really easily.  Since I made them for a Halloween Party (and yes I know I'm just now blogging this and it's almost Halloween AGAIN), being able to have them cut up and not fall apart was great. And less messy for little hands!!

RECIPE
About 9 Graham Crackers
Hershey's Chocolate Bars (6 pack)
1 Bag Mini Marshmallows
1 Tube Refrigerated Chocolate Chip Cookie Dough

Lay graham crackers in bottom of 2 8x8 pans or one larger pan.
Flatten cookie dough and lay over graham crackers.
Bake at 350 Degrees for 9 min until Cookie dough has mostly cooked through
Drop chocolate pieces over top.
Cover entire top of pan with Marshmallows.
Bake at 350 Degrees until marshmallows are brown and puffy.
Let cool and enjoy!


Monday, February 25, 2013

Multi-Colored Swirl Cookies


It's been a VERY long time since my last post. We have been very busy the past few months. Between traveling for the holidays, moving (again!) and the normal run of stomach bugs/colds and just everyday craziness, my blog fell to the wayside. I have recipes to post from Halloween, Thanksgiving and Christmas! So, let's get started!
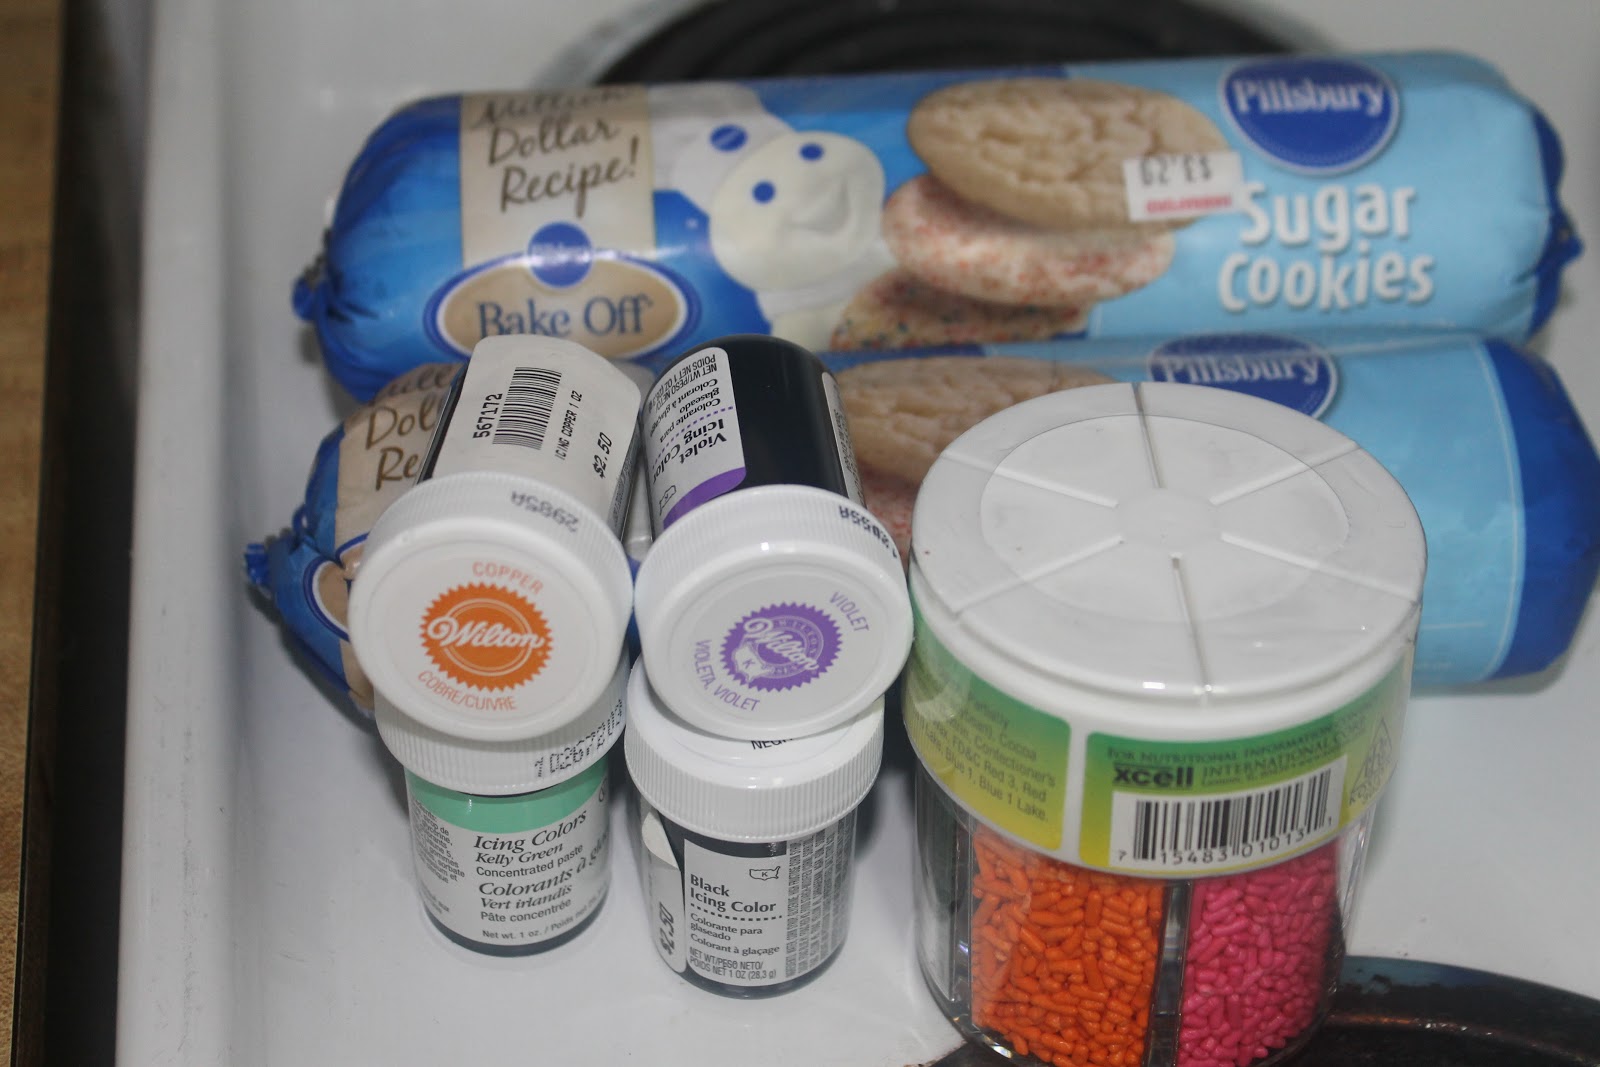
Ingredients

I have to say, I was really excited to make these cookies. I saw them on Pinterest a while ago and thought they would be so much fun to make on Halloween.  However, mine did not come out that great. They tasted good, but they didn't exactly come out looking like the ones on the original post. In hindsight, I would take the time to make the sugar cookie dough from scratch instead of using store bought dough.

Once you have your cookie dough all set, separate into 4 equal batches.  Then use food coloring (I like the gel versions best) to dye the dough. For Halloween, I used Orange, Green, Purple and Black. The neat thing about these is that you can customize them for any occasion/Holiday. To mix the color into your dough, roll each section into balls and then create a dip in the middle. Put your food coloring into the hole and then work it around until the color is completely worked through. It should resemble the below picture once you are done.
 
 
Next, you want to start ripping off chunks and rolling them into grape sized balls. You want to take care making sure they are fairly equal in size. Line them on a parchment lined baking sheet. I will admit, I rolled mine a bit too big, but I will get into that in a bit.  Once you have all your dough rolled into balls, refrigerate for about a half an hour if they are really soft. If you used store-bought dough you most likely will need to.
 
Once you are ready to make your cookies, take one ball of each color and smoosh them together forming a sort of ball. You then want to roll them out forming a rope you want to make sure that you can see all of the colors through out your rope.
Your balls should be MUCH smaller
Rope
 
Once you have your rope formed, start coiling up the rope. Start at one end and start wrapping the dough around itself. It should look like the following picture.
Coiled Cookie
 
Once you have your coiled cookie you can dip the edges in sprinkles. Then place them on parchment paper lined baking sheets.
In the oven
 
You will want to bake them at 350 degrees for about 8-9 minutes.  Now my first batch came out AWFUL. Like worst batch ever. My problem was that I initially rolled my balls too large so that my cookies were so big and they just melted into themselves.  So my second batch i halved all my balls and kept them in the fridge, just taking out what I needed and rolling.


First batch.. Awful
 
Better second batch
 
Now, my second batch came out better, however the sprinkles STILL ended up on the bottom of the cookies! I think it's because I didn't bother refrigerating the cookies after coiling so they didn't exactly hold their shape. Also, I think if I had made the dough from scratch it would have held up better.


So, if I make these again for a different holiday, I would make the dough myself and do a bit more refrigerating. But they were fun to make and they tasted pretty good.

Recipe (adapted from MakeBakeCelebrate)
Sugar Cookie Dough
Food Coloring
Sprinkles

Separate cookie dough into 4 equal parts
Dye cookie dough
Pull off chunks of cookie dough and roll into grape sized balls.
*If dough is soft, refrigerate for about 30min.
Take one ball of each color and form into a ball.
Roll out dough into a rope.
Coil dough around one end to form a cookie.
Dip edges in sprinkles.
Refrigerate to keep dough from spreading out.
Bake cookies at 350 degrees for 8-9 min.
Cool completely.